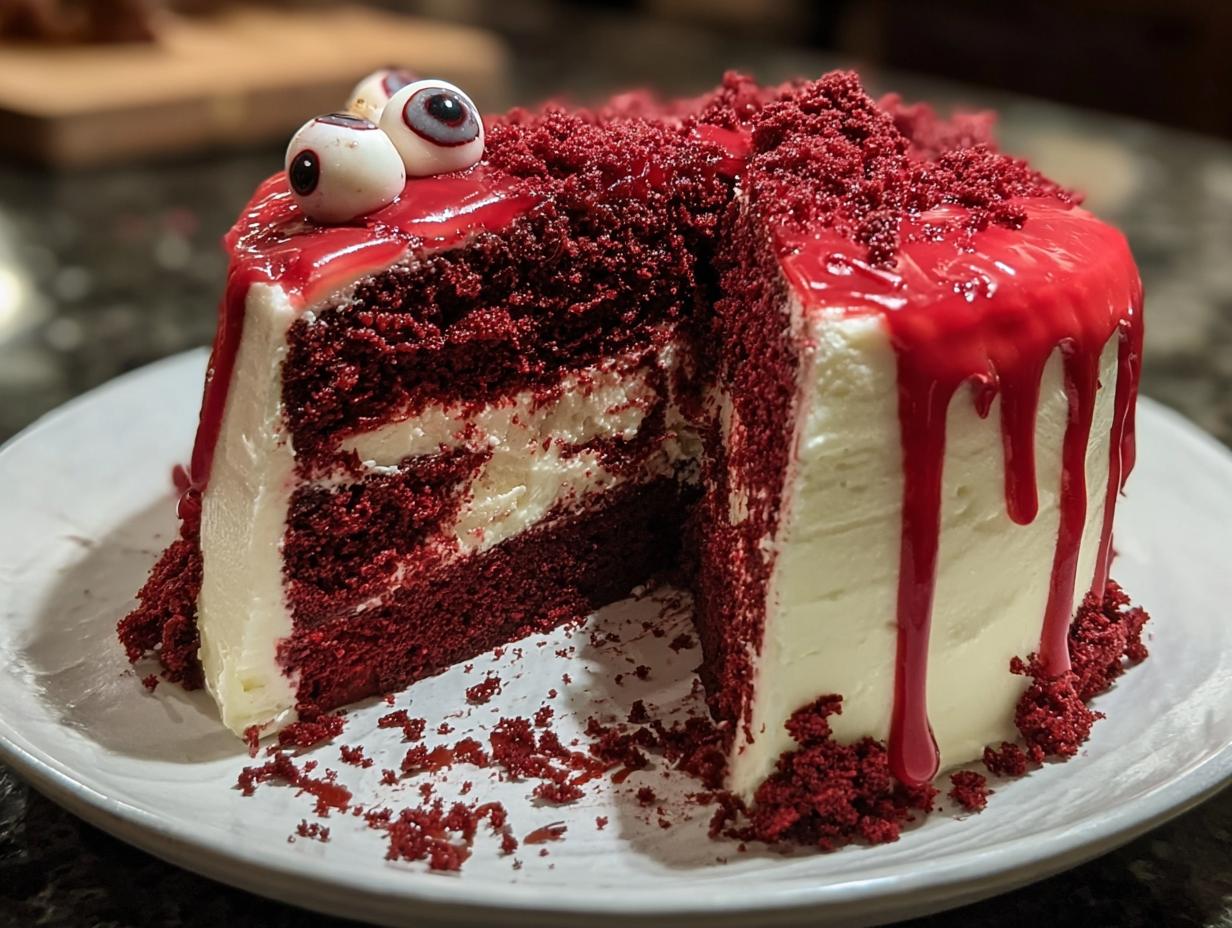
Halloween Red Velvet Cake has become my absolute favorite dessert to bake when the leaves start to turn and the air gets crisp. There’s something magical about creating a cake that’s as deliciously moist and rich as it is visually striking, especially with those dramatic red velvet hues. I remember one year, I decided to go all out with a gory red drip effect, and the delighted gasps from my friends when they saw it were priceless! The deep cocoa flavor, perfectly balanced by the tangy cream cheese frosting, makes this a truly irresistible treat. This spooky red velvet cake is guaranteed to be a showstopper at any Halloween gathering. Let’s get baking!
Why You’ll Love This Halloween Red Velvet Cake
This cake isn’t just a dessert; it’s an experience! Here’s why it’s a must-have for your spooky season celebrations:
- Incredibly moist and tender crumb that melts in your mouth.
- Rich, deep cocoa flavor with that signature red velvet tang.
- Visually stunning with its vibrant red color and customizable Halloween decorations.
- It’s an easy Halloween red velvet cake recipe, perfect for bakers of all skill levels to master.
- The tangy cream cheese frosting is the perfect complement to the cake’s sweetness.
- It’s the ideal centerpiece for any red velvet cake for Halloween party gathering.
- Customizable with gory drips, spooky toppers, and creepy crawlies to fit your theme.
- Guaranteed to impress your guests with its festive appearance and delicious taste.
Ingredients for Your Spooky Halloween Red Velvet Cake
Gather these goodies to create a cake that’s perfect for all your red velvet cake with Halloween decorations:
- 1 cup unsalted butter, softened – this gives the cake its rich, tender crumb.
- 1 ¾ cups granulated sugar – for that classic sweetness.
- 2 large eggs – at room temperature for better incorporation.
- 1 tsp vanilla extract – a flavor enhancer for that delicious aroma.
- 2 cups all-purpose flour – the base for our cake structure.
- ⅓ cup Dutch-process cocoa powder – for a deeper, smoother chocolate flavor.
- 1 tsp baking soda – helps the cake rise beautifully.
- 1 tsp salt – balances the sweetness and enhances flavors.
- 1 cup buttermilk – adds moisture and a slight tang.
- 1 tbsp white vinegar – reacts with the baking soda for lift.
- 2 tbsp red food coloring (gel) – essential for that iconic vibrant red hue without altering texture.
- 2 batches cream cheese frosting – the perfect tangy complement.
- Red candy melts for “blood” drips (optional) – for that extra spooky effect.
- Edible eyeballs or black sprinkles (optional) – for adorable or creepy finishing touches.
- Halloween cupcake toppers (optional) – to amp up the festive theme.
How to Make a Halloween Red Velvet Cake
- Step 1: Preheat your oven to 350°F (175°C). Grease and line two 8-inch round cake pans with parchment paper. This prep work ensures your cake won’t stick.
- Step 2: In a large bowl, cream together 1 cup unsalted butter, softened and 1 ¾ cups granulated sugar on medium-high speed. You want it to become light and fluffy, which usually takes about 3–4 minutes. This step is crucial for a tender cake.
- Step 3: Beat in 2 large eggs one at a time, making sure to mix well after each addition. Stir in 1 tsp vanilla extract for that classic comforting aroma.
- Step 4: In a separate bowl, whisk together 2 cups all-purpose flour, ⅓ cup Dutch-process cocoa powder, 1 tsp baking soda, and 1 tsp salt. This dry mixture forms the structure of your cake.
- Step 5: Add half of the dry ingredients to the wet ingredients and mix until just combined. Don’t overmix at this stage.
- Step 6: Now, stir in 1 cup buttermilk, 1 tbsp white vinegar, and 2 tbsp red food coloring (gel). Mix until the batter is smooth and a vivid, spooky red. This is where the magic happens for your Halloween themed red velvet cake!
- Step 7: Add the remaining dry ingredients and mix until just combined. You’re almost there!
- Step 8: Divide the batter evenly between your prepared pans. This ensures even baking.
- Step 9: Bake for 25–30 minutes, or until a wooden skewer inserted into the center of the cake comes out clean. The smell filling your kitchen will be amazing!
- Step 10: Let the cakes cool in the pans for 15 minutes before carefully inverting them onto wire racks to cool completely. Patience here is key for perfect frosting later.
- Step 11: Once completely cooled, use a serrated knife to level the tops of both cake layers. This makes stacking and frosting much easier for an easy Halloween cake decorating red velvet finish.
- Step 12: Spread a generous layer of cream cheese frosting between the two cake layers. Then, frost the top and sides of the entire cake smoothly.
- Step 13: Prepare your “blood” drips by melting red candy melts or mixing corn syrup with red gel food coloring. Carefully drizzle this mixture over the edges of the cake, letting it drip down the sides. This is a simple yet effective way of how to make Halloween red velvet cake look extra spooky.
- Step 14: Finish by decorating with edible eyeballs, black sprinkles, or Halloween cupcake toppers as desired. Get creative with your Halloween red velvet cake design ideas!

Pro Tips for the Best Halloween Red Velvet Cake
Elevate your spooky bake with these insider tips:
- Always use gel food coloring for the most vibrant red hue without watering down your batter.
- Chill your cake layers in the refrigerator for about 30 minutes before frosting. This makes them firmer and easier to handle for a cleaner finish.
- Don’t overmix the batter once the flour is added; gentle mixing ensures a tender, not tough, cake.
- For extra moisture, you can substitute some of the buttermilk with sour cream or plain yogurt.
What’s the secret to a perfect Halloween Red Velvet Cake?
The secret lies in the balance of ingredients and technique. Using Dutch-process cocoa and buttermilk creates that signature tangy flavor, while gel food coloring ensures a deep, spooky red. Getting the cream cheese frosting just right is key for a truly Halloween red velvet cake.
Can I make Halloween Red Velvet Cake ahead of time?
Absolutely! You can bake the cake layers up to two days in advance. Once completely cooled, wrap them tightly in plastic wrap and store them at room temperature. Frosting the cake the day of your party is best for freshness.
How do I avoid common mistakes with Halloween Red Velvet Cake?
A common pitfall is overmixing, which leads to a tough cake. Another is not letting the layers cool completely before frosting, causing the frosting to melt. Ensure your baking soda and vinegar react properly for that essential lift. For more baking tips, check out this guide on how to brine chicken, which highlights the importance of proper preparation.
Best Ways to Serve Your Halloween Red Velvet Cake
This spooky creation is incredibly versatile! For a classic Halloween party, serve generous slices of this Halloween Red Velvet Cake on their own – the rich flavor and vibrant color are showstoppers. For a more interactive experience, pair it with a scoop of vanilla bean ice cream or a dollop of extra cream cheese frosting. If you’re looking for a treat for trick-or-treaters, consider cubing the cake and serving it in small, festive bags. This Halloween Red Velvet Cake for trick or treat is a delightful surprise that goes beyond the usual candy!
Nutrition Facts for Halloween Red Velvet Cake
Here are the estimated nutritional values per serving for this spooktacular treat:
- Calories: 480
- Fat: 25g
- Saturated Fat: 15g
- Protein: 4g
- Carbohydrates: 58g
- Fiber: 2g
- Sugar: 38g
- Sodium: 320mg
Nutritional values are estimates and may vary based on specific ingredients used and portion size.

How to Store and Reheat Your Homemade Halloween Red Velvet Cake
Once your masterpiece is baked and decorated, proper storage is key to keeping it delicious. Make sure the cake has cooled completely before storing. For short-term storage, place the cake in an airtight container or cover it well with plastic wrap. This will keep your festive treat fresh in the refrigerator for about 3 to 4 days, maintaining that perfect texture. If you’ve made this amazing cake ahead of time and need to store it longer, you’re in luck! You can freeze individual slices or the entire cake, tightly wrapped in plastic wrap and then aluminum foil, for up to 3 months. When you’re ready to enjoy a slice again, the best way to reheat it is gently. You can thaw frozen slices overnight in the refrigerator or microwave a slice for about 10-15 seconds on a low power setting to bring back that fresh-baked feel.
Frequently Asked Questions About Halloween Red Velvet Cake
What are some creative Halloween red velvet cake design ideas?
You can transform this cake into a spooky masterpiece! Think a spiderweb design using black frosting, or a “bloody” effect with red gel. For a truly creepy look, consider adding edible eyeballs or gummy worms crawling out of the cake. Halloween red velvet cake design ideas are endless, from a haunted house to a Frankenstein monster!
Can I substitute the cream cheese frosting for something else?
While cream cheese frosting is classic, you can definitely get creative! A tangy vanilla buttercream or even a rich chocolate ganache would also pair wonderfully with the red velvet cake. For a more “gory” look, you could even use a white chocolate frosting and add red food coloring to create a marbled or dripping effect.
How do I get the “blood” drips to look realistic?
For those dramatic drips, gently warm red candy melts until smooth. You can also mix corn syrup with red gel food coloring for a similar effect. Apply it to the edges of the chilled cake using a spoon or piping bag, letting gravity do the work. The key is to have a well-chilled cake so the drips set nicely.
Is this cake suitable for a kids’ Halloween party?
Absolutely! Kids adore this cake. The vibrant color is exciting, and you can make the decorations fun and not too scary. Consider making Halloween red velvet cupcakes instead, which are easier for little hands to manage and can be decorated individually with spooky faces or candy corn.
Variations of Halloween Red Velvet Cake You Can Try
Looking to mix things up? This versatile recipe is a fantastic base for all sorts of spooky creations. For a party where little hands are involved, consider whipping up a batch of Halloween red velvet cupcakes. They bake faster and are easier for kids to decorate and enjoy. Another fun idea is to adapt the frosting technique; instead of a simple spread, try creating a classic red velvet cake with spiderweb frosting using black piping gel over white cream cheese frosting. You could also experiment with a dairy-free version by using plant-based milk and butter, or even bake the batter in mini bundt pans for individual spooky treats. The possibilities for a festive red velvet cake are truly endless!
Print
Halloween Red Velvet Cake: 1 Spooky Must-Bake
- Total Time: 50 mins
- Yield: 12 servings 1x
- Diet: Vegetarian
Description
A spooky Halloween red velvet cake with rich cocoa flavor, tangy cream cheese frosting, and gory red drip effects. This recipe is perfect for your Halloween party.
Ingredients
- 1 cup unsalted butter, softened
- 1 ¾ cups granulated sugar
- 2 large eggs
- 1 tsp vanilla extract
- 2 cups all-purpose flour
- ⅓ cup Dutch-process cocoa powder
- 1 tsp baking soda
- 1 tsp salt
- 1 cup buttermilk
- 1 tbsp white vinegar
- 2 tbsp red food coloring (gel)
- 2 batches cream cheese frosting
- Red candy melts for “blood” drips (optional)
- Edible eyeballs or black sprinkles (optional)
- Halloween cupcake toppers (optional)
Instructions
- Preheat oven to 350°F. Grease and line two 8-inch round pans with parchment paper.
- Cream butter and sugar together on medium-high speed until light and fluffy, about 3–4 minutes.
- Add eggs one at a time, mixing well after each addition. Stir in vanilla extract.
- In a separate bowl, whisk together the all-purpose flour, Dutch-process cocoa powder, baking soda, and salt.
- Add half of the dry ingredients to the wet ingredients and mix until just combined.
- Add the buttermilk, white vinegar, and red food coloring. Stir until smooth and vividly red.
- Add the remaining dry ingredients and mix until just combined.
- Divide the batter evenly between the prepared pans.
- Bake for 25–30 minutes, or until a wooden skewer inserted into the center comes out clean.
- Cool the cakes in the pans for 15 minutes before inverting them onto wire racks to cool completely.
- Once cooled, level the cake layers using a serrated knife.
- Spread frosting between the layers, then frost the top and sides of the cake.
- Prepare the “blood” drips by melting red candy melts or mixing corn syrup with red gel food coloring. Drizzle the melted mixture over the edges of the cake.
- Decorate with edible eyeballs, black sprinkles, or Halloween cupcake toppers as desired.
Notes
- Use gel food coloring for the deepest red color without affecting the cake’s texture.
- Chill the cake layers before frosting for cleaner lines and easier stacking.
- Add sour cream for extra moisture if desired.
- Freeze cake layers for neater frosting and stacking.
- Try skull molds for a haunting shape, draw spiderwebs with black gel on the frosting, or bake in a bundt pan and pour “blood” glaze over top.
- Prep Time: 20 mins
- Cook Time: 30 mins
- Category: Dessert
- Method: Baking
- Cuisine: American
Nutrition
- Serving Size: 1 slice
- Calories: 480
- Sugar: 38g
- Sodium: 320mg
- Fat: 25g
- Saturated Fat: 15g
- Unsaturated Fat: 8g
- Trans Fat: 0g
- Carbohydrates: 58g
- Fiber: 2g
- Protein: 4g
- Cholesterol: 90mg
Keywords: Halloween Red Velvet Cake, spooky cake, Halloween dessert, red velvet cake for Halloween party, easy Halloween red velvet cake recipe