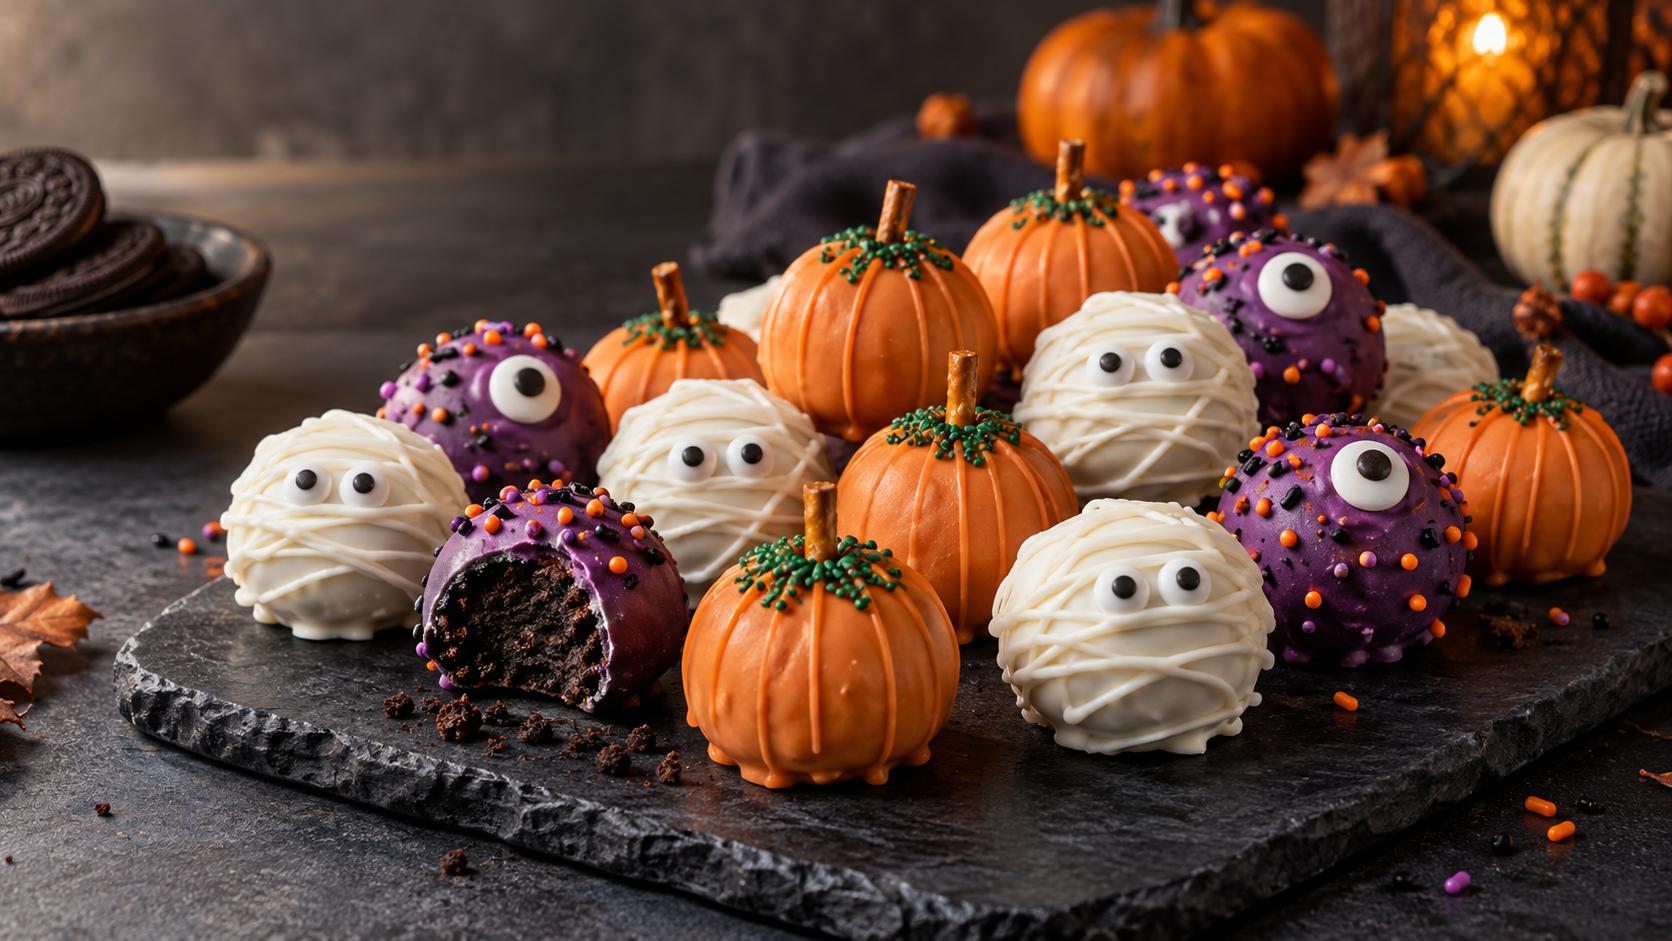
Halloween Oreo Balls are no-bake cookie truffles made with crushed Oreo cookies, cream cheese, and candy coating. Turn one batch into pumpkins, mummies, and monsters, or keep decorating simple with Halloween sprinkles.
Jump to Recipe · Decorating Ideas · Storage and Serving
Images are AI-generated illustrations of ingredients, coating, and decorating ideas.
Print
Halloween Oreo Balls
- Total Time: 75 minutes
- Yield: About 30 balls
Description
No-bake Oreo cookie truffles with cream cheese, candy coating, and pumpkin, mummy, or monster decorations.
Ingredients
- 14 ounces (397 g) regular Oreo cookies, including the filling
- 8 ounces (226 g) full-fat block cream cheese, softened enough to mix
- 12 ounces (340 g) candy melting wafers, in your chosen color or colors
- Halloween sprinkles, as needed
- Candy eyes, optional
- Extra candy melting wafers for decorative drizzles, optional
- Short pretzel pieces and green sprinkles for pumpkin decorations, optional
Instructions
- Prepare the tray. Line a baking sheet with parchment paper. Set out your decorations before melting the coating.
- Crush the cookies. Process the Oreo cookies with their filling until the crumbs are fine and even. Alternatively, crush them thoroughly in a sealed zip-top bag with a rolling pin.
- Mix the filling. Mix the crumbs with the cream cheese until no dry crumbs or cream-cheese streaks remain. The mixture should hold together when pressed.
- Shape the balls. Divide the filling into about 30 equal portions, roughly 21 g each before coating, and roll them between your palms. Place on the prepared tray. If the filling is too soft to shape, refrigerate it until workable.
- Chill. Refrigerate for about 30 minutes, or until the centers hold their shape when lifted. Keep most of the tray refrigerated while coating a few balls at a time.
- Melt the coating. Use a completely dry microwave-safe bowl and follow the wafer package’s heating directions, stirring as directed. Melt one color at a time. Stop heating once the coating is smooth and fluid.
- Coat and decorate. Rest a chilled ball on a fork and spoon coating over it. Tap gently to drain excess coating, then slide it onto parchment with a second fork. Add sprinkles or eyes while the coating is wet. For mummies, let the base coat set before adding a drizzle.
- Set and refrigerate. Refrigerate for about 20 minutes, or until the shell is firm to a light touch. Transfer to an airtight container and keep refrigerated until serving.
Notes
Equipment: food processor, or zip-top bag and rolling pin; bowl and spatula; baking sheet; parchment; scoop; microwave-safe bowl; fork. A scale and piping bag are optional.
Timing: approximately 25 minutes active preparation, 30 minutes chilling before dipping, and 20 minutes setting. No baking; melt the coating according to its package directions. Times and yield are estimates. Allow extra time for detailed decorations or multiple colors.
Coating: divide the 12 ounces between your chosen colors. Have extra available for drizzling or a thicker shell.
Storage: keep refrigerated at 40°F (4°C) or below. Limit time at room temperature to two hours, or one hour above 90°F (32°C).
- Prep Time: 25 minutes
- Chilling and setting: 50 minutes
- Cook Time: 0 minutes
- Category: Dessert
- Method: No-Bake
Nutrition
- Serving Size: 1 ball
Keywords: Halloween Oreo balls, Oreo truffles, mummy Oreo balls, pumpkin Oreo balls
Ingredient Notes and Substitutions

Cookies: weigh 14 ounces (397 g) rather than relying on package size, and keep the cream filling in the cookies. Use regular Oreos for the stated proportions; extra filling can change the texture. Other cookie varieties are untested variations for this recipe.
Cream cheese: use block cream cheese for this version. Whipped spreads and reduced-fat alternatives are not interchangeable without checking the filling’s texture.
Coating: colored candy wafers simplify pumpkin and monster decorations. White or dark melting wafers also work with sprinkles. Chocolate chips are an untested substitution here; their melting and setting behavior depends on the product.
How to Dip Halloween Oreo Balls
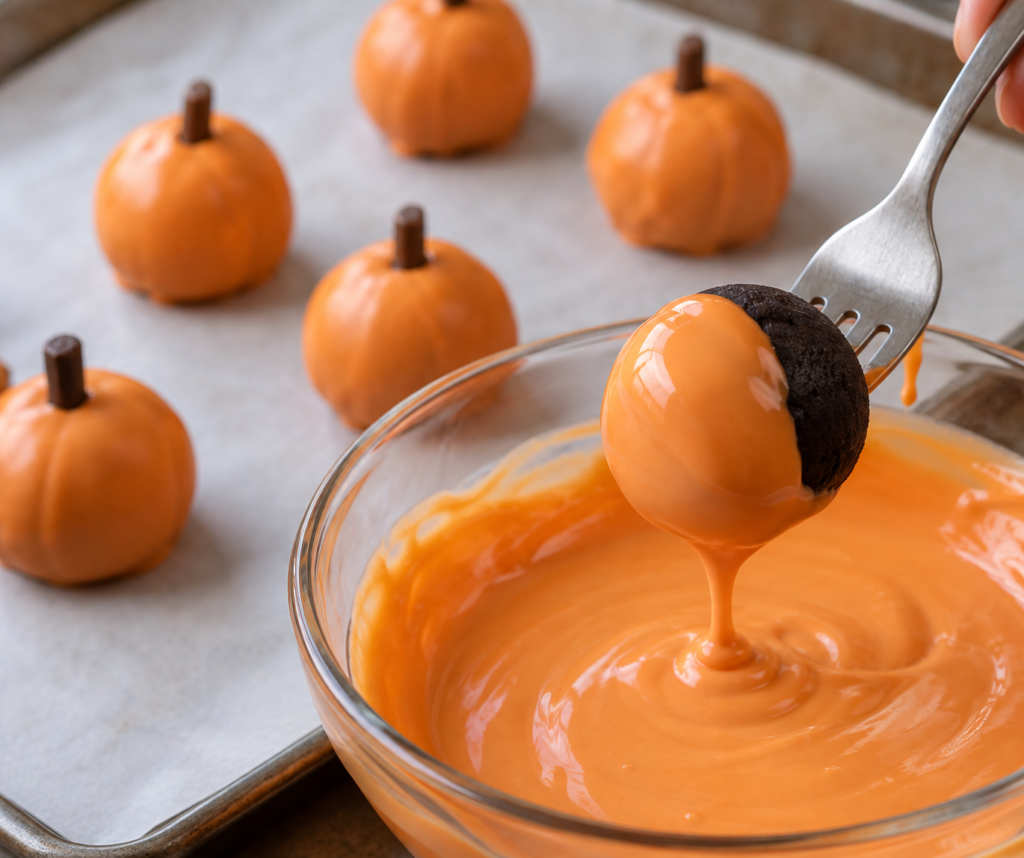
Use chilled centers that hold their shape and coating that flows off a spoon. Support each ball on a fork rather than stirring it around the bowl. Keep the next few centers in the refrigerator while you work.
Keep the bowl and utensils dry. Water can make melted candy seize, and overheating can also spoil its texture. Follow the manufacturer’s directions for any thinning product instead of adding water or milk. Wilton’s coating guide explains the difference between coating that has cooled and coating damaged by moisture or heat.
Three Halloween Oreo Ball Decorating Ideas
For a mixed tray of about 30 treats, set aside roughly 10 centers for each design. One color with sprinkles is the quickest option.
Pumpkin Oreo Balls
Coat the centers in orange wafers. Before the shell sets, add a short pretzel stem and a pinch of green sprinkles. For raised pumpkin lines, pipe thin orange lines over the set shell using extra melted coating.
Monster Oreo Balls
Use purple or green coating, then add one large candy eye and sprinkles while the surface is still wet. Place the eye on the side that will face forward on the platter.
Mummy Oreo Balls
Coat the centers in white wafers and let the shell set. Drizzle thin lines of extra white coating across each ball. Attach two candy eyes with small dots of melted coating, leaving them visible between the bandages.
Troubleshooting
| Problem | What to check | What to do |
|---|---|---|
| Filling is too soft to roll | The mixture may be warm or the cream cheese may be a spread rather than a block. | Chill until it holds its shape, then portion and roll. Use the listed ingredient types. |
| Centers break apart while dipping | Centers may need more chilling, or thick coating may be dragging them apart. | Chill until firm and spoon fluid coating over each supported ball. |
| The candy shell cracks after setting | A large temperature difference between the center and coating may be involved. | Use refrigerated centers rather than frozen-solid ones, and avoid overly hot coating. |
| Coating becomes thick | It may have cooled; moisture or overheating can also be responsible. | Gently rewarm only if it has cooled. Follow package troubleshooting directions for damaged coating; do not add water. |
| Decorations fall off | The shell may have set before they were attached. | Use a small dot of melted coating to attach them. |
For the same type of candy shell on dipped cake pops, Wilton identifies a large temperature change as a cause of cracking. Keeping centers chilled rather than frozen solid is a practical precaution here.
Storage and Party Serving
Store the finished Oreo balls in an airtight container in the refrigerator at 40°F (4°C) or below. Separate layers with parchment once the shells are firm. The candy coating does not replace refrigeration for the cream-cheese filling.
Put out a small serving plate and replenish it from the refrigerator. Keep time at room temperature within two hours, or one hour when the temperature is above 90°F (32°C), following FDA guidance for perishable foods.
Frequently Asked Questions
Do I remove the Oreo filling?
No. Crush the entire cookie, including its filling, before mixing it with cream cheese.
Can I make Oreo balls without a food processor?
Yes. Use a sturdy zip-top bag and rolling pin to crush the cookies into fine crumbs, then mix thoroughly with the softened cream cheese in a bowl.
Can I prepare the filling before decorating?
Yes. Keep the shaped centers covered in the refrigerator while you prepare the coating and decorations. Dip them when they are firm enough to hold their shape.
Are these Halloween Oreo Balls gluten-free or dairy-free?
This version is neither: regular Oreo cookies contain wheat, and cream cheese contains milk. Coatings and decorations may contain additional allergens. Check every ingredient label, including sprinkles and candy eyes, before serving anyone with an allergy. Dietary substitutions have not been tested for this recipe.
Choose one design or assemble a mixed tray, then keep it refrigerated until serving. For another Halloween dessert idea, see our Halloween ice cream, or browse the dessert recipes.