Introduction
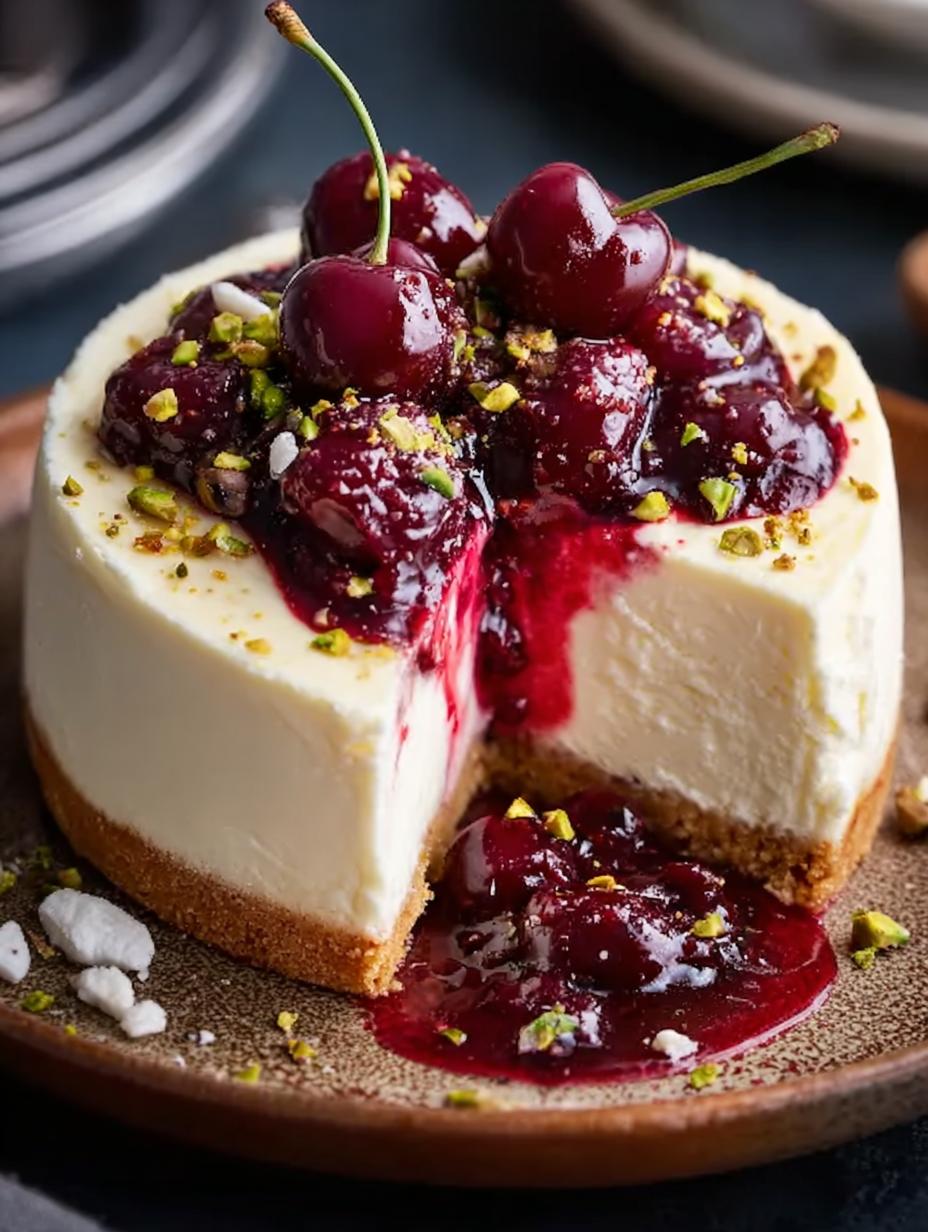
Cherry Cheesecake with Pistachio is a delightful dessert that combines the creamy richness of cheesecake with the nutty crunch of pistachios. This easy recipe features a pistachio crust that adds a unique flavor, making it a perfect choice for any gathering or special occasion. The vibrant cherry topping not only enhances the visual appeal but also complements the nutty flavor wonderfully, creating a harmonious balance of taste. Let’s dive into this delicious recipe!
Why You’ll Love This Cherry Cheesecake with Pistachio
There are countless reasons to adore this Cherry Cheesecake. First and foremost, it’s an impressive dessert that will wow your guests at any gathering. The rich, creamy texture paired with the crunchy pistachio crust creates a delightful contrast. This recipe is easy to follow, making it perfect even for novice bakers. You can enjoy it as a Pistachio Cherry Cheesecake or experiment with different toppings to suit your taste. Plus, it’s vegetarian-friendly, ensuring everyone can enjoy a slice. The vibrant colors and flavors make it not just a treat for the taste buds but also for the eyes!
Ingredients for Cherry Cheesecake with Pistachio
Gather these items:
- For the Pistachio Crust:
- 1 1/2 cups pistachio nuts (shelled and unsalted)
- 1/4 cup granulated sugar
- 1/4 cup unsalted butter, melted
- For the Cheesecake Filling:
- 16 ounces cream cheese, softened
- 1 cup granulated sugar
- 1 teaspoon vanilla extract
- 3 large eggs
- 1 cup sour cream (or Greek yogurt)
- For the Cherry Topping:
- 1 can (21 ounces) cherry pie filling (or homemade cherry topping)
- Fresh cherries (for garnish, optional)
How to Make Cherry Cheesecake with Pistachio Step-by-Step
- Step 1: Preheat your oven to 350°F (175°C).
- Step 2: In a food processor, pulse the pistachio nuts until finely ground. Be careful not to over-process; you want a crumbly texture, not nut butter.
- Step 3: In a medium bowl, combine the ground pistachios, sugar, and melted butter. Mix until well combined.
- Step 4: Press the mixture firmly into the bottom of a 9-inch springform pan to form an even layer.
- Step 5: Bake the crust in the preheated oven for 10 minutes. Remove from the oven and let it cool while you prepare the cheesecake filling.
- Step 6: In a large mixing bowl, beat the softened cream cheese and sugar together until smooth and creamy.
- Step 7: Add the vanilla extract and mix well.
- Step 8: Add the eggs one at a time, mixing on low speed until just combined. Be careful not to overmix.
- Step 9: Fold in the sour cream until fully incorporated.
- Step 10: Pour the cheesecake filling over the cooled pistachio crust, smoothing the top with a spatula.
- Step 11: Bake in the oven for 50-60 minutes, or until the center is set but still slightly jiggly. The edges should be firm.
- Step 12: Once baked, turn off the oven and leave the cheesecake inside with the door slightly ajar for about 1 hour to cool slowly. This helps prevent cracking.
- Step 13: After cooling, remove the cheesecake from the oven and let it cool to room temperature. Then refrigerate for at least 4 hours, or overnight for best results.
- Step 14: Once chilled, spread the cherry pie filling evenly over the top of the cheesecake. If desired, garnish with fresh cherries.
- Step 15: Carefully remove the sides of the springform pan. Slice and serve your delicious Cherry Cheesecake with Pistachio!

Pro Tips for the Best Cherry Cheesecake with Pistachio
Keep these in mind:
- Chilling the cheesecake overnight enhances the flavor and texture.
- Feel free to experiment with different toppings like chocolate shavings or whipped cream.
- For a no-bake version, consider using a no-bake cheesecake mix or substituting the baking steps with chilling time only.
Best Ways to Serve Cherry Cheesecake with Pistachio
Here are a few serving ideas:
- Serve with a dollop of whipped cream on top for added creaminess.
- Pair with a scoop of vanilla ice cream for a delightful contrast.
- For a festive touch, consider garnishing with fresh mint leaves alongside fresh cherries.
How to Store and Reheat Cherry Cheesecake with Pistachio
To store your cheesecake, cover it tightly with plastic wrap or aluminum foil. It can be kept in the refrigerator for up to 5 days. If you want to enjoy it later, you can freeze individual slices for up to 2 months. When ready to serve, thaw in the fridge overnight before indulging.
Frequently Asked Questions About Cherry Cheesecake with Pistachio
What’s the secret to perfect Cherry Cheesecake with Pistachio?
The key is to bake it slowly and let it cool gradually in the oven, which helps prevent cracks. Using high-quality ingredients also enhances the overall flavor and texture.
Can I make Cherry Cheesecake with Pistachio ahead of time?
Absolutely! This cheesecake can be made a day or two in advance. Just make sure to store it properly in the refrigerator to maintain freshness.
How do I avoid common mistakes with Cherry Cheesecake with Pistachio?
Be careful not to overmix your batter, as this can introduce too much air and cause cracks. Also, ensure that ingredients are at room temperature before mixing for a smoother batter.
Variations of Cherry Cheesecake with Pistachio You Can Try
Feel free to get creative with these variations:
- Try a No-Bake Cherry Cheesecake with Pistachios by using gelatin instead of baking.
- Experiment with other nuts like almonds or walnuts for the crust.
- Make a Cherry and Pistachio Cream Cheese Dessert by layering the cheesecake mixture with fresh cherries and a nut topping.

For more delicious dessert ideas, check out our latest recipes or try making Cranberry Orange Pancakes for a delightful breakfast. If you’re interested in more cheesecake variations, visit Nutella Cheesecake Bars for a chocolatey twist!
Print
Cherry Cheesecake with Pistachio: 7 Irresistible Steps
- Total Time: 1 hour 5 minutes
- Yield: 8 servings 1x
- Diet: Vegetarian
Description
Easy Cherry Cheesecake Recipe with Pistachio Crust
Ingredients
- For the Pistachio Crust:
- 1 1/2 cups pistachio nuts (shelled and unsalted)
- 1/4 cup granulated sugar
- 1/4 cup unsalted butter, melted
- For the Cheesecake Filling:
- 16 ounces cream cheese, softened
- 1 cup granulated sugar
- 1 teaspoon vanilla extract
- 3 large eggs
- 1 cup sour cream (or Greek yogurt)
- For the Cherry Topping:
- 1 can (21 ounces) cherry pie filling (or homemade cherry topping)
- Fresh cherries (for garnish, optional)
Instructions
- Preheat your oven to 350°F (175°C).
- In a food processor, pulse the pistachio nuts until finely ground. Be careful not to over-process; you want a crumbly texture, not nut butter.
- In a medium bowl, combine the ground pistachios, sugar, and melted butter. Mix until well combined.
- Press the mixture firmly into the bottom of a 9-inch springform pan to form an even layer.
- Bake the crust in the preheated oven for 10 minutes. Remove from the oven and let it cool while you prepare the cheesecake filling.
- In a large mixing bowl, beat the softened cream cheese and sugar together until smooth and creamy.
- Add the vanilla extract and mix well.
- Add the eggs one at a time, mixing on low speed until just combined. Be careful not to overmix.
- Fold in the sour cream until fully incorporated.
- Pour the cheesecake filling over the cooled pistachio crust, smoothing the top with a spatula.
- Bake in the oven for 50-60 minutes, or until the center is set but still slightly jiggly. The edges should be firm.
- Once baked, turn off the oven and leave the cheesecake inside with the door slightly ajar for about 1 hour to cool slowly. This helps prevent cracking.
- After cooling, remove the cheesecake from the oven and let it cool to room temperature. Then refrigerate for at least 4 hours, or overnight for best results.
- Once chilled, spread the cherry pie filling evenly over the top of the cheesecake. If desired, garnish with fresh cherries.
- Carefully remove the sides of the springform pan. Slice and serve your delicious Cherry Cheesecake with Pistachio Crust!
Notes
- Chilling the cheesecake overnight enhances the flavor and texture.
- Feel free to experiment with different toppings.
- Prep Time: 25 minutes
- Cook Time: 60 minutes
- Category: Dessert
- Method: Baking
- Cuisine: American
Nutrition
- Serving Size: 1 slice
- Calories: 380
- Sugar: 28g
- Sodium: 210mg
- Fat: 24g
- Saturated Fat: 12g
- Unsaturated Fat: 8g
- Trans Fat: 0g
- Carbohydrates: 36g
- Fiber: 2g
- Protein: 6g
- Cholesterol: 95mg
Keywords: Cherry Cheesecake, Pistachio Crust, Dessert Recipe