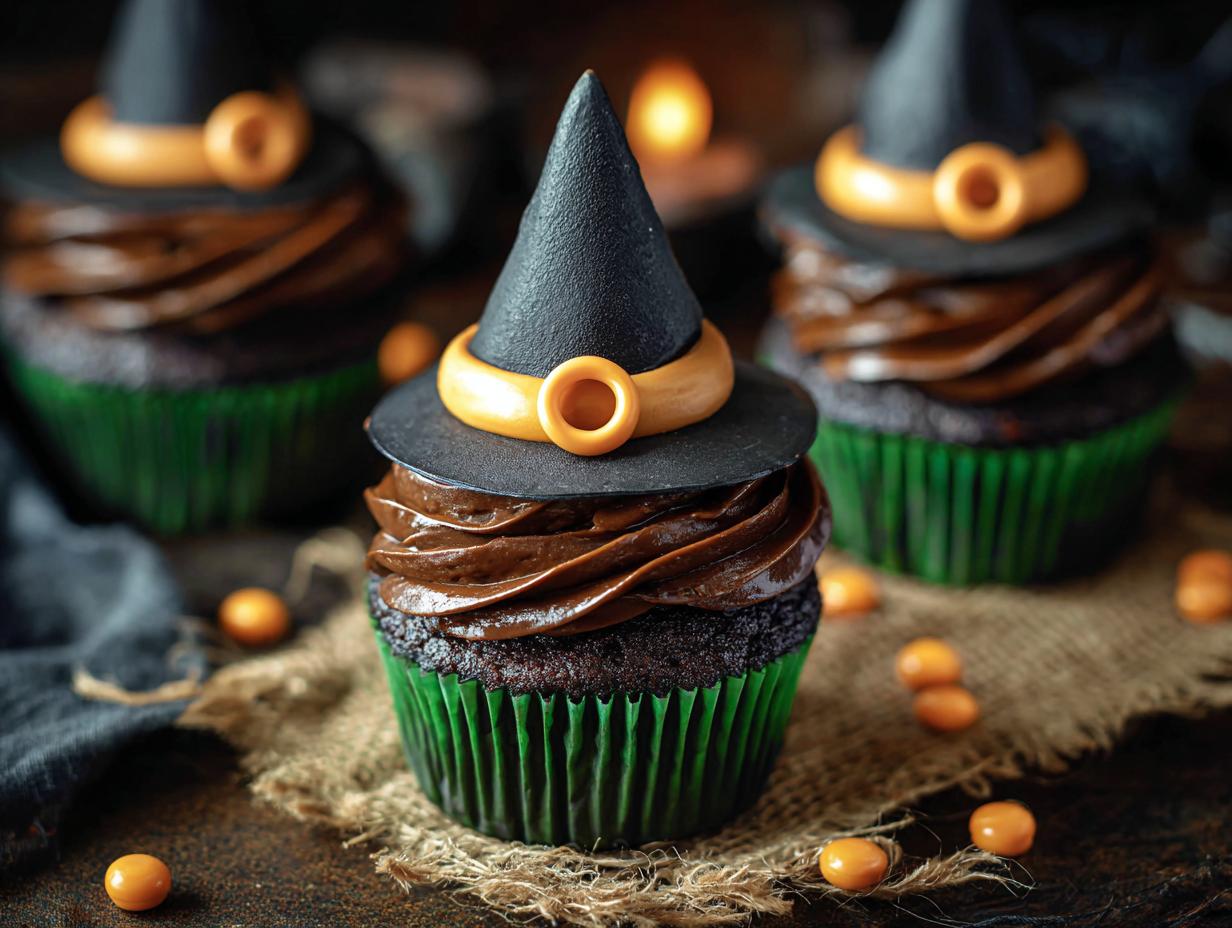
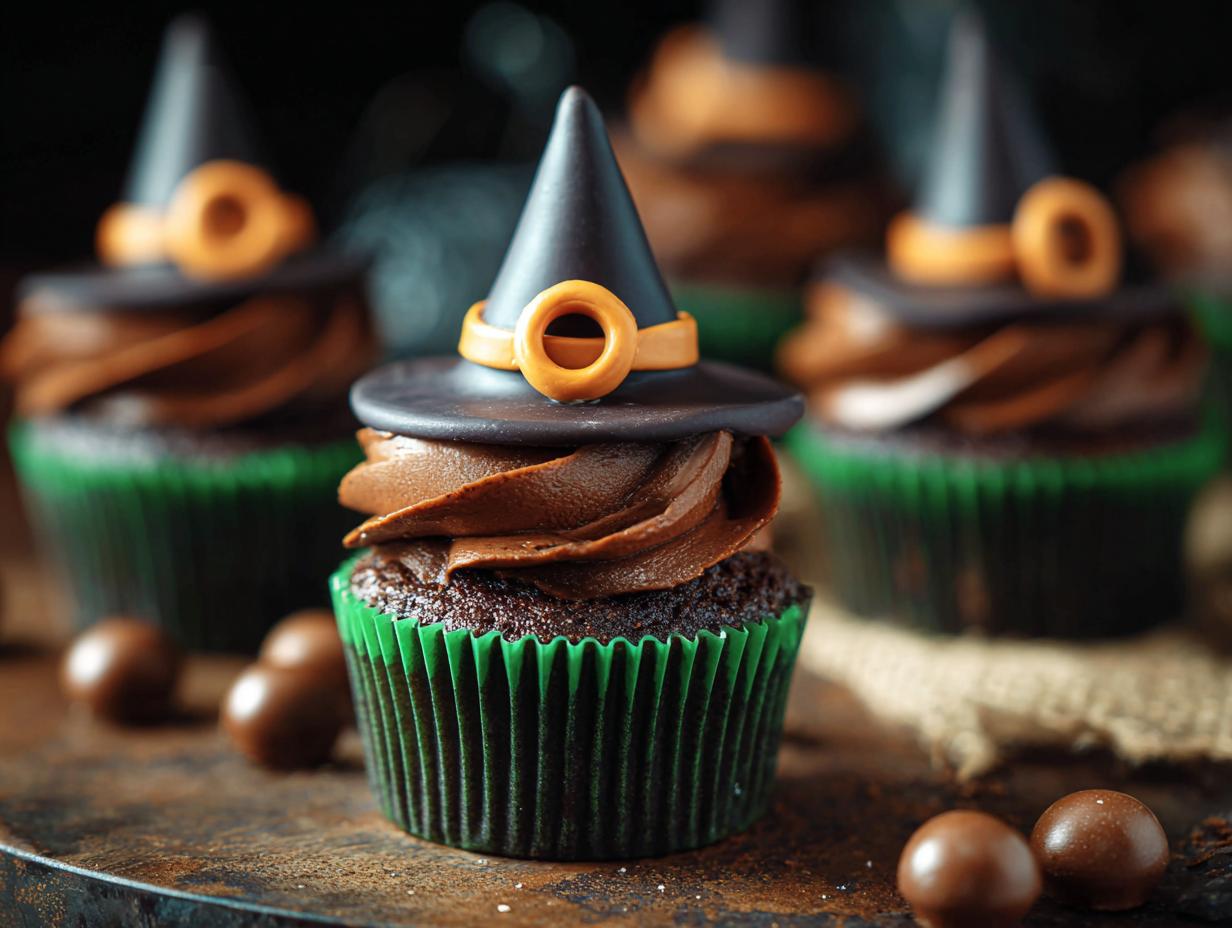
Witch Hat Cupcakes have been a staple in my Halloween celebrations for years, and I’m so excited to share this recipe with you. There’s something so magical about these spooky treats, especially when you see the kids’ eyes light up. I remember one Halloween, my niece helped me make these, and the smell of the chocolate-dipped cones and sweet frosting filled our kitchen. They ended up being the hit of the party! These Halloween witch hat cupcakes are surprisingly simple to whip up, making them the perfect addition to your festive spread. Let’s get cooking!
Why You’ll Love These Witch Hat Cupcakes
- Incredible Taste: A perfect blend of rich chocolate cake, creamy frosting, and crunchy cookie brim.
- Super Speedy Prep: You can whip up these easy witch hat cupcakes in just about 20 minutes of active prep time.
- Family-Friendly Fun: These are fantastic Halloween witch hat cupcakes for kids to help decorate, making it a memorable activity.
- Budget-Conscious Baking: Made with common pantry staples, these are a budget-friendly way to impress at any Halloween party.
- Visually Stunning: They look like they came from a professional bakery, but they’re surprisingly simple to create.
- Customizable Colors: Easily tint the frosting to match your party theme or favorite spooky colors.
- A Guaranteed Hit: Everyone adores these easy witch hat cupcakes; they’re always the first to disappear!
Ingredients for Witch Hat Cupcakes
Gathering your ingredients is the first step to creating these amazing chocolate witch hat cup-cakes. You’ll need a standard box of chocolate cake mix, plus the eggs, oil, and water it calls for. For the creamy frosting, I like to use 1 cup unsalted butter, softened, 3 cups powdered sugar, 1-2 tablespoons milk, and 1 teaspoon vanilla extract. Don’t forget your food coloring – purple, green, or orange are my go-to Halloween shades! For the hats, grab sugar cones and Oreo cookies (whole). You’ll also need chocolate chips or melting chocolate for dipping the cones, and festive sprinkles or edible glitter to make them sparkle. A little piping gel or frosting is handy for attaching decorations, and of course, more Halloween-themed sprinkles or stars for that extra magic.

How to Make Witch Hat Cupcakes
Getting these spooky treats ready is easier than you think! Follow these simple steps for how to make witch hat cupcakes that will wow everyone this Halloween.
- Step 1: Bake and Cool the Cup-cakes
First, preheat your oven to the temperature specified on your chocolate cake mix box, usually around 350°F (175°C). Prepare your cupcake liners and batter as directed. Bake for the recommended time, typically 18-22 minutes, until a toothpick inserted into the center comes out clean. Let the cupcakes cool in the pan for a few minutes before transferring them to a wire rack to cool completely. This is crucial for frosting! - Step 2: Prepare the Frosting
While the cupcakes cool, let’s make the frosting. In a large bowl, beat the 1 cup softened unsalted butter until it’s perfectly smooth and creamy. Gradually add the 3 cups powdered sugar, 1 teaspoon vanilla extract, and 1-2 tablespoons milk, beating until you achieve a fluffy, spreadable consistency. Now for the fun part – divide the frosting into bowls and tint each with your chosen Halloween food coloring, like purple, green, or orange. Swirl them together or keep them separate for a multi-colored effect. - Step 3: Decorate the Witch Hats
This is where the magic really happens as we create the witch hats. Melt your chocolate chips or melting chocolate according to package directions. Dip each sugar cone into the melted chocolate, ensuring it’s fully coated. Gently lift it out and let any excess chocolate drip off. Immediately place the chocolate-coated cone onto the center of a whole Oreo cookie, pressing down slightly to create the brim of the hat. Place these on parchment paper to set completely. - Step 4: Frost and Assemble the Cup-cakes
Once your cupcakes are completely cool, it’s time to frost them. Use a piping bag with a star tip, or simply a knife, to generously frost each cupcake with your colorful frosting. I love swirling on multiple colors for a festive look! Next, carefully place one of your chocolate-covered cone-and-Oreo witch hats onto the center of each frosted cupcake. Add your favorite Halloween-themed sprinkles, edible glitter, or candy accents to personalize each one. Now you’ve mastered how to make witch hat cup-cakes!
Pro Tips for the Best Witch Hat Cupcakes
Want to make your Halloween witch hat cupcakes absolutely perfect? I’ve picked up a few tricks along the way that really elevate these spooky treats.
- Chill the cones: For easier dipping and a cleaner coat, chill your sugar cones in the freezer for about 15 minutes before dipping them in melted chocolate.
- Room temperature ingredients for frosting: Ensure your butter and milk are at room temperature for the smoothest, fluffiest frosting. This makes decorating a breeze.
- Don’t overbake: Keep an eye on your cupcakes; overbaking is the quickest way to dry them out. A toothpick test is your best friend here.
- Cool completely: Seriously, let those cupcakes cool *all the way* before frosting. Warm cupcakes will melt your beautiful frosting into a sad puddle.
What’s the secret to perfect Witch Hat Cupcakes?
The secret to truly perfect Witch Hat Cup-cakes lies in the details: chilling the cones before dipping for a smooth chocolate coat and ensuring your cupcakes are completely cool before frosting. This guarantees a beautiful, structural cupcake.
Can I make Witch Hat Cupcakes ahead of time?
Yes! You can bake the cupcakes and store them in an airtight container at room temperature for up to two days. Decorate the witch hats (cone and Oreo) ahead of time too. Assemble the final cupcakes a few hours before serving to keep the Oreo brim from getting soggy.
How do I avoid common mistakes with Witch Hat Cupcakes?
A common pitfall is frosting warm cupcakes, which melts the frosting. Always let them cool completely! Also, don’t overmix your frosting, or it can become stiff. Gently folding in colors is better than aggressive mixing.
Best Ways to Serve Witch Hat Cupcakes
These magical Witch Hat Cupcakes are almost too cute to eat, but when you do, they’re a delightful treat! For a truly enchanting presentation, arrange them on a tiered stand surrounded by other Halloween goodies like candy corn or spooky popcorn balls. They also make fantastic individual favors for Halloween parties; simply place each one in a clear cellophane bag tied with a ribbon. For a fun pairing, serve these Witch hat dessert cupcakes alongside a glass of cold milk or a warm cup of spiced apple cider – the flavors complement the chocolate and sweetness beautifully. They are perfect for a kids’ Halloween party or any festive gathering!
Nutrition Facts for Witch Hat Cupcakes
Here’s a look at the estimated nutritional breakdown for one of these delightful Witch Hat Cupcakes. Keep in mind that the exact figures can vary based on the specific cake mix and frosting ingredients you use.
- Calories: Approximately 350-400
- Fat: 18-22g
- Saturated Fat: 10-12g
- Protein: 3-5g
- Carbohydrates: 45-55g
- Fiber: 1-2g
- Sugar: 30-40g
- Sodium: 200-300mg
Nutritional values are estimates and may vary based on specific ingredients used.
How to Store and Reheat Witch Hat Cupcakes
Properly storing your delightful homemade witch hat cupcakes ensures they stay fresh and festive for your Halloween festivities. After decorating, make sure the cupcakes are completely cool before storing. For short-term storage, place them in an airtight container, ensuring they aren’t squished together. You can keep them at room temperature for up to 2 days, or in the refrigerator for 3-4 days if your frosting contains dairy or cream cheese. If you need to store them longer, these Witch Hat Cupcakes freeze beautifully! Wrap each cupcake individually in plastic wrap, then place them in a freezer-safe container or bag. They’ll keep well in the freezer for up to 3 months. To reheat, simply bring them back to room temperature for about an hour before serving. You can also gently warm them in a low oven (around 300°F or 150°C for just a few minutes) if you prefer a slightly warm treat.
Frequently Asked Questions About Witch Hat Cupcakes
Can I use a different cookie for the witch hat brim?
Absolutely! While Oreos are fantastic for their crisp texture and dark color, you can experiment with other round, dark cookies like chocolate wafers or even some types of chocolate sandwich cookies. The key is a sturdy cookie that can hold the cone and frosting without breaking.
What are some other Witch hat cupcake decorating ideas?
Beyond the standard frosting and sprinkles, get creative! You can use edible glitter for a magical shimmer, pipe on candy cobwebs with black piping gel, or even add candy googly eyes to the cupcake base for a spooky face. A small piece of licorice lace can be added to the brim for extra detail. These ideas really make your Witch Hat Cupcakes stand out!
How do I get the frosting to stick to the cone?
A little bit of frosting acts as edible glue! Once your cupcakes are frosted, place a small dollop of frosting on top of the cupcake and then gently press the chocolate-covered cone into it. This helps secure the hat and also adds another layer of flavor. For heavier decorations on the hat itself, a bit of piping gel can provide extra hold.
Can I make these into Witch hat cookie cupcakes?
Yes, you can! If you’re looking for something a bit different, consider making a batch of witch hat cookies separately to go alongside your cupcakes. Or, you could even try a “cookie cupcake” approach where the base is more like a shortbread or sugar cookie dough that’s baked in a muffin tin. However, the classic recipe using a cake mix with a sugar cone and Oreo brim is generally considered the easiest and most iconic way to achieve these Witch Hat Cupcakes.
Variations of Witch Hat Cupcakes You Can Try
Once you’ve mastered the basic recipe, there are so many fun ways to switch up these Witch Hat Cupcakes! For a gluten-free version, simply use your favorite gluten-free chocolate cake mix and ensure your sprinkles are also certified gluten-free. You can also adapt these for a dairy-free diet by using a dairy-free cake mix, plant-based milk in the frosting, and dairy-free chocolate for dipping the cones. These make fantastic Witch hat cupcakes for kids because you can get them involved in all the colorful decorating! For a different flavor profile, try using a vanilla cake mix and white chocolate for dipping the cones, or even add a swirl of raspberry filling inside the cupcake for a fruity surprise.
Print
Witch Hat Cupcakes: 1 Easy Spooky Treat
- Total Time: 40 minutes
- Yield: 12 cupcakes 1x
- Diet: Vegetarian
Description
Create enchanting Witch Hat Cupcakes for Halloween. This easy recipe features chocolate-dipped sugar cone hats atop Oreo cookie brims, colorful frosting, and festive sprinkles, perfect for parties and kids.
Ingredients
- 1 box chocolate cake mix
- Eggs, oil, and water (as required by cake mix)
- 1 cup unsalted butter, softened
- 3 cups powdered sugar
- 1–2 tbsp milk
- 1 tsp vanilla extract
- Food coloring (purple, green, or orange)
- Sugar cones
- Oreo cookies (whole)
- Chocolate chips or melting chocolate
- Sprinkles or edible glitter
- Piping gel or frosting (for attaching decorations)
- Halloween-themed sprinkles or stars
- Optional: Edible googly eyes, Licorice laces, Mini cauldrons or themed wrappers
Instructions
- Bake Cupcakes: Prepare cupcakes according to mix or recipe. Let them cool completely.
- Make Frosting: Beat softened butter until smooth. Gradually add powdered sugar, vanilla, and milk until desired consistency is reached. Tint frosting with Halloween colors.
- Decorate Witch Hats: Melt chocolate chips. Dip sugar cones into chocolate to coat fully. Press each coated cone onto the center of an Oreo cookie to form a hat shape. Place hats on parchment paper to set.
- Frost Cupcakes: Pipe or spread the colored frosting onto each cooled cupcake.
- Assemble: Place a chocolate-dipped cone hat on top of each frosted cupcake. Add sprinkles, edible glitter, or candy accents to personalize each witch hat cupcake.
- Serve: Display your finished Witch Hat Cupcakes on a Halloween-themed platter or cake stand and enjoy.
Notes
- Bake cupcakes the day before and store in an airtight container. Add hats just before serving for best texture.
- For cauldron cupcakes, scoop out a bit of the cupcake center and fill with green frosting or candy gel.
- For a Summerween twist, use vanilla cupcakes, white chocolate-dipped cones, and neon sprinkles.
- Store decorated cupcakes in the refrigerator for up to 2-3 days.
- Set up a decorate-your-own station for toddlers to make these Halloween witch hat cupcakes a fun activity.
- Prep Time: 20 minutes
- Cook Time: 20 minutes
- Category: Dessert
- Method: Baked
- Cuisine: American
Nutrition
- Serving Size: 1 cupcake
Keywords: Witch Hat Cupcakes, Witch hat cupcake recipe, Halloween witch hat cupcakes, Easy witch hat cupcakes, How to make witch hat cupcakes, DIY witch hat cupcakes, Chocolate witch hat cupcakes, Spooky witch hat cupcakes, Best witch hat cupcakes, Witch hat cupcakes for kids, Homemade witch hat cupcakes, What are witch hat cupcakes, Witch hat cupcake decorating ideas, Simple witch hat cupcakes, No bake witch hat cupcakes, Black witch hat cupcakes, Magic witch hat cupcakes, Witch hat cookie cupcakes, Fun witch hat cupcakes, Witch hat dessert cupcakes, Witch hat cupcake tutorial